API
Web Meeting API
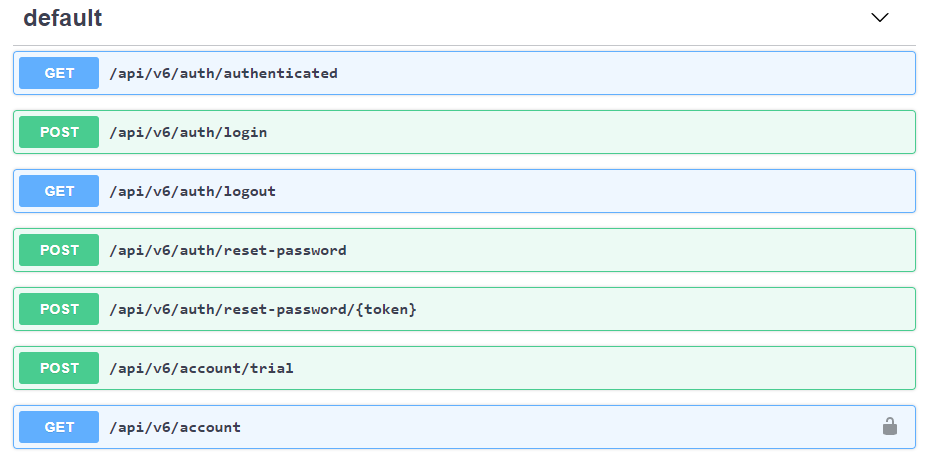
Web Meeting complete API documentation: http://editor.swagger.io/?url=https://meeting.myprovider.xyz/api/v6/documentation/swagger
Overview
This short tutorial shows the basics steps one need to implement in order to create new accounts and schedule meetings on behalf of accounts.
This document uses “CURL” for the examples. Of course, any other mechanism to generate REST calls works as well.
Prerequisites
API Key
You need an API-KEY with the “Account” and “Meeting” permission.
Note: You must keep the API-KEY secret and call the APIs from a server only. Everyone who has access to the API-KEY has full control over your web meeting platform
Note: In the examples below, replace the placeholders within brackets, e.g. <API KEY> with your own values.
Terminology
Throughout this short documentation we will be using the following terms:
- Domain Name: that’s the domain name under which your web meeting instance runs
- Account: an account is an entity under which meeting organizers are created
- Meeting Organizers: a meeting organizer is a person who is allowed to schedule meetings within an account. A meeting organizer is defined by an email address. An email address can only exists once within a web meeting instance.
- Account ID: the internal ID of an account
- User ID: the internal ID of a user
- Meeting ID: the internal ID of a meeting
Create account
Before we can schedule meetings we need to create an account. At the same time we also create the first Meeting Organizer within that account:
Input data:
{
“sendPassword”: true,
“accountType”: “trial”,
“adminFirstname”: “Test”,
“adminLastname”: “User”,
“adminEmail”: “test-user@example.com”,
“adminPreferredLanguage”: “en”, \
“paidUntil”: “2020-04-19T19:03:41.203Z”
}
Example:
curl ‘https://<DOMAIN NAME>/api/v6/account’ \
-X POST \
-H ‘X-API-KEY: <API KEY>’ \
-H ‘content-type: application/json’ \
–data-binary ‘{“sendPassword”: true,”accountType”: “trial”,”adminFirstname”: “Test”,”adminLastname”: “User”,”adminEmail”: “test-user@example.com”, “adminPreferredLanguage”: “en”,”paidUntil”: “2020-04-19T19:03:41.203Z”}’
Upon success the system responses with the following data set:
{
“responseCode”: 0,
“data”: {
“name”: “test-user@example.com”,
“accountType”: “trial”,
“numberOfMeetings”: 0,
“numberOfMeetingOrganizers”: 0,
“numberOfMeetingRooms”: 1,
“paidUntil”: “2020-04-27T12:23:33.852Z”,
“iceCandidatesToFilter”: [],
“customDialInNumbers”: [],
“displayStandardDialInNumbersInInvite”: true,
“defaultMeetingPermissions”: null,
“defaultMeetingType”: “standard”,
“defaultMeetingHasDialin”: false,
“defaultMeetingHasRecording”: false,
“autoExtendMeetings”: false,
“autoDeleteMeetingsAfterXDays”: 360,
“id”: “5e9459c5b863b82cefdddf4f”,
“canAddMeetingOrganizer”: true,
“accountRooms”: []
}
}
Note the Account ID “5e9459c5b863b82cefdddf4f” in this example. We will be using the Account ID in the next step.
Retrieve the account admin
Once we have an Account we need to retrieve the User ID of the first Meeting Organizer:
curl ‘https://<YOUR DOMAIN>/api/v6/account/admin/5e9459c5b863b82cefdddf4f’ \
-X GET \
-H ‘X-API-KEY: <API KEY>’ \
-H ‘content-type: application/json’
Upon success the system responses with the following data set:
{
“responseCode”: 0,
“data”: [
{
“email”: “test-user@example.com”,
“firstName”: “Test”,
“lastName”: “User”,
“externalUserId”: null,
“preferredLanguage”: “en”,
“timezone”: “Europe/Paris”,
“additionalTimezones”: [],
“id”: “5e9459c5b863b82cefdddf4e”,
“icsToken”: “ce5494bc-d691-4caf-906c-bfa6403fdc71-32a0633d-99e7-41ff-bfe9-e28fe2f10e73”,
“icsPath”: “/api/v6/meeting/calender/user/ce5494bc-d691-4caf-906c-bfa6403fdc71-32a0633d-99e7-41ff-bfe9-e28fe2f10e73”
}
]
}
Note the User ID “5e9459c5b863b82cefdddf4e” in this example. We will be using the User ID in the next step.
Creating meetings
We can now schedule meetings on behalf of the user. The minimal data set we need to send is the following:
{
“topic”:”My Meeting Topic”,
“startTime”:”2020-04-07T09:00:00.000Z”,
“endTime”:”2020-04-07T10:00:00.000Z”,
“duration”:60,
“type”:”standard”,
“isRecurring”:false,
“isRecorded”:false,
“isDialin”:false,
“invitedParticipants”:[],
“recurring”:{},
“meetingPermissionId”:null
}
Note that we use the USER ID from the API call above
curl ‘https://<YOUR DOMAIN>/api/v6/meeting’ \
-X POST \
-H ‘X-USER-ID: <USER ID>’ \
-H ‘X-API-KEY: <YOUR API KEY>’ \
-H ‘content-type: application/json’ \
–data-binary ‘{“topic”:”My Meeting Topic”,”startTime”:”2020-04-07T09:00:00.000Z”, “endTime”:”2020-04-07T10:00:00.000Z”,”duration”:60,”type”:”standard”,”isRecurring”:false,”isRecorded”:false,”isDialin”:false,”invitedParticipants”:[],”recurring”:{},”meetingPermissionId”:null}’
Upon success the system responses with the following data set:
{
“responseCode”: 0,
“data”: {
“invitedParticipants”: [],
“meetingId”: “9974-7653-8886-0485”,
“id”: “5e945c36b863b82cefdddf54”,
“topic”: “My Meeting Topic”,
“startTime”: “2020-04-07T09:00:00.000Z”,
“endTime”: “2020-04-07T10:00:00.000Z”,
“duration”: “60”,
“type”: “standard”,
“roomId”: “5e9459c5b863b82cefdddf50”,
“isRecurring”: false,
“isDialin”: false,
“recurring”: {
“frequencyType”: “”,
“frequency”: null,
“monthlyPattern”: “”,
“endsType”: “”,
“endsOn”: “2020-04-13T12:18:07.211Z”,
“endsAfter”: 0
},
“isRecorded”: false,
“agenda”: “”,
“documents”: [],
“meetingPermissionId”: null,
“videoResolution”: “standard”,
“dtClosedAt”: null,
“whitelabelId”: “5c737902b377b0f7fbf81fce”,
“addedByUserId”: “5e9459c5b863b82cefdddf4e”,
“addedByUserEmail”: “test-user@example.com”,
“accountId”: “5e9459c5b863b82cefdddf4f”,
“addedByUserName”: “Test User”,
“timezone”: “Europe/Zurich”,
“privateDataVisible”: true,
“icalSequence”: “0”,
“icsToken”: “c89f842f-3295-4bf9-807d-a46841fbc2ec-25f722e4-70fc-4163-9cda-b4b7d8aec358”,
“isActive”: false,
“isClosed”: true,
“isOpen”: false,
“dialInConferenceRoom”: null,
“dialInNumbers”: [],
“dialInPin”: null,
“sipProxy”: null,
“sipDomain”: null,
“isDemo”: false,
“isPromo”: false
}
}
Note the Meeting ID “5e945c36b863b82cefdddf54” in this example. We will be using the Meeting ID in the next step.
Updating meetings
We can update the meeting as follows:
{
“topic”:”My Updated Meeting Topic”,
“id”: “5e945c36b863b82cefdddf54”,
“startTime”:”2020-04-07T09:30:00.000Z”,
“endTime”:”2020-04-07T10:30:00.000Z”,
“duration”:60,
“type”:”standard”,
“isRecurring”:false,
“isRecorded”:false,
“isDialin”:false,
“invitedParticipants”:[],
“recurring”:{},
“meetingPermissionId”:null
}
Example:
curl ‘https://<YOUR DOMAIN>/api/v6/meeting/<Meeting ID>/false’ \
-X PUT \
-H ‘X-USER-ID: <USER ID >’ \
-H ‘X-API-KEY: <YOUR API KEY>’ \
-H ‘content-type: application/json’ \
–data-binary ‘{“topic”:”My Updated Meeting Topic”,”id”: “5e945c36b863b82cefdddf54″,”startTime”:”2020-04-07T09:05:00.000Z”,”endTime”:”2020-04-07T10:00:05.000Z”,”duration”:60,”type”:”standard”,”isRecurring”:false,”isRecorded”:false,”isDialin”:false,”invitedParticipants”:[],”recurring”:{},”meetingPermissionId”:null}’